我想這一個免費服務的終止造成了許多使用者的影響。
包含我自己在內。
前段時間我使用了 Telegram bot 來做文章推播,
詳細的串接方式也有做文章記錄。
延伸閱讀:【技術分享】在 Laravel 中使用 Telegram bot API 製作免費通知功能
但 Telegram 在台灣的使用者可能遠遠不及於 LINE,
所以我還是針對 LINE Messaging API 做了一個推播文章的通知功能。
將串接 API 的詳細步驟紀錄於此,
提供給有需要的讀者及未來的自己。
步驟 1:登入 LINE Developers
先登入至 LINE Developers 的後台,
如果沒有 Providers 的話,先創建一個。
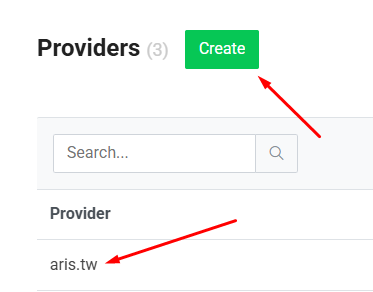
先點擊綠色 Create 並輸入 Provider 名稱,
創建完成後點擊該 Provider 進入內頁。
步驟 2:創建官方帳號以設定 Messaging API
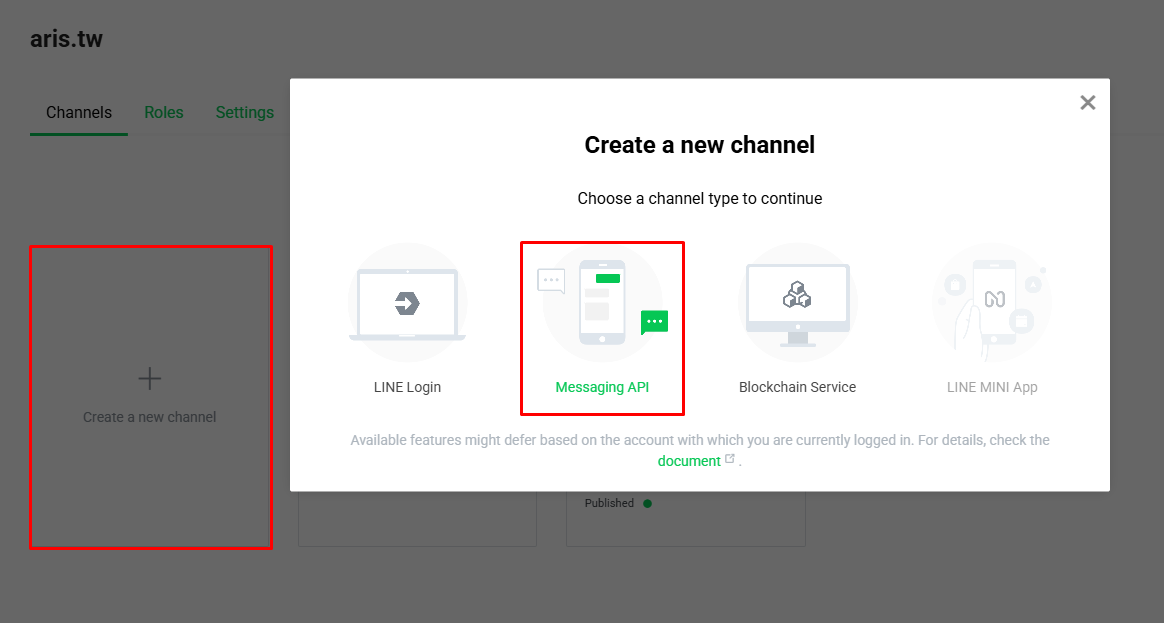
點擊 Create a new channel 開啟彈跳視窗,
並且點擊 Messaging API。
後續會得到系統提示,
會跳轉至 LINE Official Account 創建官方帳號。
請依步驟執行完成。
步驟 3:取得 Channel access token
官方帳號創建完成後,回到 LINE Developers,
進入 Provider 內頁應該會看到有一個 Messaging API 的 Channel。
進入後切換分頁至 Messaging API,
拉到最下面可以找到 long-lived 的 Channel access token。
取得 token 之後就能進入開發囉!
步驟 4:於 .env 及 config/app.php 設定 token
首先先於 .env 中將 token 寫入
LINE_CHANNEL_ACCESS_TOKEN=OOOOOOOOOOOOOOOOOOOOOOOOOOOOOOOOOOOOOOOO
接著在 config/app.php 中引入該參數
'LINE_CHANNEL_ACCESS_TOKEN' => env('LINE_CHANNEL_ACCESS_TOKEN'),
步驟 5:開一個 LineService 來使用
在 LINE Messaging API 中有許多不同的推播方式,
就連推播出去的樣式也可以有所不同。
本次設計是以所有有加入官方帳號好友的人皆可收到通知,
且以圖片帶一個按鈕的方式顯示內容。
<?php

namespace App\Services;

use GuzzleHttp\Client;
use GuzzleHttp\Exception\GuzzleException;
use Illuminate\Support\Facades\Log;

class LineMessagingService
{
    protected mixed $token;

    public function __construct()
    {
        $this->token = config('app.LINE_CHANNEL_ACCESS_TOKEN');
    }

    /**
     * 發送 Buttons Template 訊息給多個用戶
     *
     * @param string $text 訊息文字
     * @param string $imageUrl 圖片 URL
     * @param string $buttonUrl 按鈕連結 URL
     * @return array 回應結果
     * @throws GuzzleException
     */
    public function broadcastButtonTemplate(string $text, string $imageUrl, string $buttonUrl): array
    {
        $message = [
            'type' => 'template',
            'altText' => '新文章上架',
            'template' => [
                'type' => 'buttons',
                'thumbnailImageUrl' => $imageUrl,
                'imageAspectRatio' => 'rectangle',
                'imageSize' => 'cover',
                'imageBackgroundColor' => '#FFFFFF',
                'text' => $text,
                'actions' => [
                    [
                        'type' => 'uri',
                        'label' => '閱讀文章',
                        'uri' => $buttonUrl
                    ]
                ]
            ]
        ];

        return $this->broadcast([$message]);
    }

    /**
     * 向全部用戶發送訊息
     *
     * @param array $messages 訊息內容
     * @return array 回應結果
     * @throws GuzzleException
     */
    public function broadcast(array $messages): array
    {
        $httpClient = new Client();
        $apiBaseUrl = 'https://api.line.me/v2/bot';
        try {
            $response = $httpClient->post($apiBaseUrl . '/message/broadcast', [
                'headers' => [
                    'Content-Type' => 'application/json',
                    'Authorization' => 'Bearer ' . $this->token
                ],
                'json' => [
                    'messages' => $messages,
                ],
            ]);

            $result = json_decode($response->getBody()->getContents(), true);
            Log::info('LINE 訊息推播成功', ['result' => $result]);
            return ['success' => true, 'result' => $result];
        } catch (\Exception $e) {
            Log::error('LINE 訊息推播失敗', ['error' => $e->getMessage()]);
            return ['success' => false, 'error' => $e->getMessage()];
        }
    }
}
其他推播方式及 template 樣式可參閱 LINE Messaging API 官方文件https://developers.line.biz/en/reference/messaging-api
步驟 6:在 Controller 中使用 LineService
當我們寫好 Service 之後,
便可以在 Controller 或者排程中使用。
以下是以 Controller 作為範例
...

protected LineMessagingService $lineService;

public function __construct(LineMessagingService $lineService)
{
    parent::__construct();
    $this->lineService = $lineService;
}

...

public function sendNotification($id)
{
    $article = Article::find($id);

    $result = $this->lineService->broadcastButtonTemplate(
        $article->title,
        asset($article->cover_image),
        route('article-content', $article->id),
    );

    return response()->json($result);
}
首先我們使用建構子引入稍早寫好的 Service。由於我的 Controller 並不是直接繼承 Laravel 中的 Controller,
所以我追加了 parent::__construct(); 一行來確保 setup 的初始化。
後續寫了一個 function 來呼叫 LINE 推播,
至於這個 function 另外用 template 的按鈕來呼叫的細節就不贅述。
這樣基本就完成了 LINE 的推播,
但必須切記輕用量版本一個月僅能發送 200 則推播,
中用量及高用量則每個月需新台幣 800 及 1200 元。
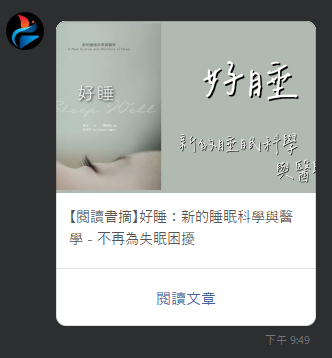
實際推播出來後的樣子就會長這樣,
有著文章標題、圖片及明顯的連結按鈕。
最後,
如果讀者有興趣關注我的文章,
也可以點擊下方 Telegram 及 LINE 連結來加入好友。
一旦有新文章便會立即與您分享!
Telegram 加入好友
LINE 加入好友